


How To Choose LED Strip Lights For Different Spaces?
Rated:  , 0 Comments
, 0 Comments
Total hits: 4
Posted on: 08/13/26
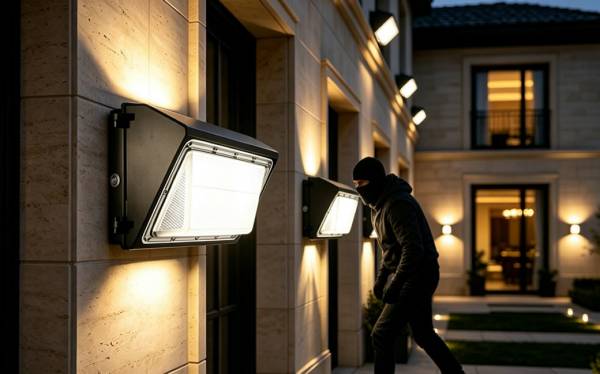
Different Types of LED Strip Lights on the Market
LED strip lights are categorized by multiple core standards: light color, voltage, waterproof grade, LED chip density, control method, structure, and usage scenario. Below is a complete, clear classification:
1. By Light Color & Color Adjustment (Most Common Classification)
1.1 Single-color LED Strips
Only one fixed light tone, stable light output, low cost, mainly for functional auxiliary lighting.
- Warm white (2700K–3000K): Cozy ambient lighting for bedrooms, living rooms
- Neutral white (4000K): Kitchens, studies, vanity areas
- Cool white (6000K–6500K): Garages, warehouses, basements
- Single colored monochrome: Pure red, green, blue, pink, amber, used for decoration, signage, holiday decor.
1.2 RGB LED Strips
3-in-1 chips (red + green + blue) on one bead. Mix three primary colors to create over 16 static colors.
- Limitation: Cannot produce pure white light; only colored decorative lighting
- Use: TV backlights, party decor, bar atmosphere lighting
1.3 RGBW LED Strips
Add an independent pure white chip to RGB. Can switch between colorful modes and natural white lighting.
- Advantage: Dual-purpose (decor + daily fill light), ideal for living room ceiling troughs
1.4 RGBIC / IC Addressable Pixel Strips
Independent IC chip controls each LED bead separately. Supports segmented, flowing, chasing, marquee, rainbow dynamic effects.
- Premium type; compatible with smart APP control
- Use: Gaming rooms, window displays, stage lighting, creative wall decor
1.5 CCT Tunable White Strips (Dual White / CW+WW)
No color mixing, only adjust warm ↔ cool white temperature (2700K–6500K).
- Perfect for daily living, makeup, reading where accurate white light is needed
- Use: Bedrooms, studies, bathroom mirrors
2. By Working Voltage
Low-voltage strips (12V / 24V DC)
- Safe to touch, low heat, suitable for hidden indoor installation, children’s rooms
- Need matched power adapters; 12V better for short runs (<5m), 24V for longer lengths (no voltage drop)
- Most popular for home decoration
High-voltage strips (110V / 220V AC)
- Direct plug-in without transformers, support ultra-long continuous laying (20–50m)
- Must be covered by insulation casing; not safe for exposed touch
- Mainly for commercial storefronts, long corridors, outdoor eaves
3. By Waterproof & Moisture Resistance (IP Rating)
- IP20 Non-waterproof Bare circuit board, no coating; only for dry indoor spaces (ceiling coves, TV backgrounds). Cannot touch water or damp air.
- IP44 Splash-proof Thin silicone glue surface coating; resists accidental splashes. For kitchen cabinets, bathroom vanity areas (away from showers).
- IP65 Fully coated silicone waterproof Entire strip wrapped in silicone gel; withstands rain splashes. Balconies, outdoor eaves.
- IP67 Tube waterproof Strip sealed inside hollow silicone/PVC tube, fully submersible short-term. Ponds, shower enclosures, outdoor ground lighting.
- IP68 Deep submersible Fully sealed, long-term underwater use. Swimming pool edge lighting, aquarium decor.
4. By LED Density (LED beads per meter)
- 30 LEDs/m: Low brightness, thin light strips, simple holiday decoration
- 60 LEDs/m: Standard brightness, most widely used for home ambient lighting
- 120 LEDs/m: High brightness, uniform light, no dark spots; under-cabinet task lighting, display cabinets
- 240 LEDs/m (high-density super slim strip): Ultra-smooth even light, premium hidden ceiling light troughs
5. By Control & Dimming Function
- Basic non-dimmable strips: Fixed brightness, simple on/off only
- DC dimmable strips: Compatible with dimmer switches to adjust brightness for single white/CCT strips
- Remote control strips: Infrared / RF remote to switch colors, adjust brightness, change flash modes
- Smart WiFi/Bluetooth strips: Mobile APP control, voice control (Alexa, Google Home, smart speakers), timer, scene modes, music sync light rhythm
6. By Physical Structure & Form Factor
- Standard flexible PCB strips: Thin bendable circuit board, can curve around corners, most mainstream
- Hard LED strip bars (rigid light bars): Aluminum base, cannot bend, high heat dissipation. For cabinet shelf lighting, commercial showcase lighting
- COB LED strips (Chip on Board): No individual visible beads, seamless uniform light with zero dark dots. High-end interior decoration, premium ceiling lighting
- Mini slim micro strips: Extra narrow width (3–5mm), for tiny gaps: mirror frames, miniature display cabinets
- Aluminum channel embedded strips: Matched with aluminum profiles for heat dissipation, anti-glare, longer service life
7. Special Functional Types
- Music sync LED strips: Built-in sound sensor, lights flash and shift colors with music beats
- Cuttable LED strips: Marked cut points every 2.5/5/10cm for custom length
- Self-adhesive backing strips: 3M tape on the back for easy sticking to walls, cabinets
- UV LED strips: Purple light, for sterilization, resin curing, decorative blacklight effects
How To Choose LED Strip Lights For Different Spaces
1. Key Core Selection Factors
Brightness & Lumen
- Low-lumen (120–300 lm/m): Ambient decorative lighting, bedroom bedside, display cabinets
- Medium-lumen (400–700 lm/m): Auxiliary task lighting, kitchen countertops, vanity mirrors
- High-lumen (800–1200 lm/m): Primary fill lighting, under-cabinet workshop, garage
Color Temperature (CCT)
- 2700K–3000K Warm Yellow: Living room, bedroom, dining room, creates cozy, relaxing atmosphere
- 4000K Neutral White: Kitchen, study, bathroom, restores true color for work & makeup
- 6000K Cool White: Garage, storage room, basement, high clarity for detailed work
Waterproof Rating
- IP20 (non-waterproof): Indoor dry spaces only – ceiling coves, TV background walls
- IP44 (splash-proof): Bathroom vanity, kitchen cabinet edges (no direct water spray)
- IP65/IP67 (waterproof): Balcony, outdoor eaves, under swimming pool edges, shower zones
Voltage Type
- 12V/24V low voltage: Safe for hidden installation, bedroom, kid’s room; requires power adapter
- 110V/220V high voltage: Long-distance laying (over 10m), corridor, commercial storefronts
2. Space-by-Space Matching Guide
Living Room
Pick 24V warm white IP20 LED strips for ceiling light troughs; RGBIC color-changing strips for TV backlight to boost cinematic vibe. Medium brightness for soft ambient lighting, avoid overly bright cool white.
Bedroom
Low-brightness 2700K warm strips. Install under bed frames or wardrobe skirting. Dimmable function is a must for night lights; no high-lumen cool lights to prevent sleep disruption.
Kitchen
4000K neutral white IP44 splash-proof strips under wall cabinets. High lumen to illuminate cutting zones, accurately showing food colors. Avoid RGB colorful lights for cooking areas.
Bathroom
IP65 waterproof neutral white strips around vanity mirrors. Anti-moisture circuit design is essential; skip non-waterproof models near shower stalls.
Study & Home Office
4000K neutral white medium-bright strips behind desks or bookshelves. Reduces screen glare, eases eye strain during long reading/working hours.
Balcony & Outdoor
IP67 waterproof 24V strips. Warm white for leisure balcony decor; cool white for storage outdoor work areas. Anti-UV casing prevents yellowing under sunlight.
Commercial Spaces (Café/Store)
RGB/RGBIC adjustable color strips for window displays; high-lumen neutral white strips for shelf commodity lighting. High-voltage strips for long shop front layouts.
3. Extra Practical Tips
- Dimmable & smart control: Choose strips compatible with app/remote dimming for multi-scene mode switching
- PCB thickness: Thick copper circuit boards avoid brightness drop for long installation lengths
- CRI index: CRI>90 for makeup counters, kitchen and art display areas for accurate color rendering
How to Install LED Strip Lights in Different Spaces
This guide covers universal pre-install preparation, space-specific step-by-step installation methods, safety rules, and key tips for indoor & outdoor areas.
Part 1: Universal Pre-Install Preparation
1. Tools & Accessories You Need
LED strip, matching power supply/driver, controller (RGB/RGBIC/CCT models), wire connectors, 3M adhesive tape, aluminum channel (optional, anti-glare & heat dissipation), scissors, measuring tape, cleaning cloth, cable clips, silicone sealant (wet areas).
2. Critical Pre-Checks
- Measure target length, cut the strip only at marked cut lines to avoid damaging circuits.
- Wipe installation surfaces thoroughly: remove dust, grease, paint residue (adhesive fails on dirty walls).
- Test the full strip by connecting power before sticking it permanently.
- Match voltage strictly: 12V/24V low-voltage strips need dedicated adapters; never connect directly to mains 220V.
- Waterproof strips: seal cut joints with silicone glue if trimmed, to block moisture.
Part 2: Space-by-Space Installation Tutorial
1. Living Room (Ceiling Cove, TV Background Wall)
A. Ceiling Light Trough (IP20 non-waterproof 24V single white/RGBIC)
- Clean the inner groove of the ceiling cornice. Install aluminum channels inside the trough for softer light.
- Peel off the 3M backing and press the strip firmly along the channel base; use cable clips for extra fixation on long runs over 5m.
- Hide the power adapter and controller inside a hidden ceiling storage box to avoid exposed wires.
- Route wires through wall gaps; connect to wall power socket or hidden wall outlet.
B. TV Backlight
- Stick strips evenly along the 4 edges of the TV rear panel. Leave a small gap between the strip and wall to avoid light compression.
- Tuck excess wire behind the TV stand; plug the USB-powered strip into the TV USB port or separate adapter.
- Pair with Bluetooth/WiFi controller for mobile app color adjustment.
2. Bedroom (Bed frame, wardrobe, bedside shelf)
Recommended: Dimmable 2700K warm white low-brightness IP20 strips
- Under-bed skirting: Wipe bed base wood/plastic surface, attach strips along the bottom inner edge facing the floor. Hide the adapter behind the bed headboard.
- Wardrobe interior: Stick strips to the top inner frame of wardrobes; run wires out through wardrobe hinge gaps. Install a small touch sensor switch for one-touch lighting when opening doors.
- Avoid installing bright strips facing the pillow to prevent sleep disturbance; use remote dimming to lower night light brightness.
3. Kitchen (Under-cabinet lighting, island counter)
Required: IP44 splash-proof 4000K neutral white strips
- Wipe grease off cabinet undersides completely (grease ruins adhesive).
- Affix strips along the front edge of wall cabinets, pointing downward toward cutting boards.
- Secure wire routes along cabinet back panels with cable clips to avoid dangling wires.
- Seal all cut strip joints with silicone glue to block water/oil splashes.
- Hide adapters inside upper cabinet storage compartments; connect to kitchen wall sockets with waterproof socket covers.
4. Bathroom (Mirror vanity, shower periphery)
Required: IP65 / IP67 waterproof strips, moisture-proof drivers
- Vanity mirror surround: Stick strips around the mirror frame, 5–10cm away from sink water splashes. Seal all wire connection points with silicone sealant.
- Shower area (only IP67 rated strips): Embed strips inside sealed PVC tubes, mount on wall niche edges; never use bare IP20/IP44 strips within shower spray zones.
- Route all power adapters outside the bathroom wet zone, use bathroom waterproof wall sockets.
5. Study / Home Office (Desk rear, bookshelf)
4000K CCT adjustable low-glare strips with aluminum channel
- Mount strips on the back lip of the desk, shining backward to reduce screen blue light reflection.
- For open bookshelves: Attach strips to each shelf top edge, hide wiring behind shelf panels.
- Install a dimmer switch to adjust brightness for reading or screen work modes.
6. Balcony & Outdoor Eaves (Outdoor decoration)
Required: IP67/IP68 waterproof UV-resistant strips
- Clean outdoor metal/wood eaves thoroughly, remove moss and dust.
- Place strips inside waterproof aluminum channels to prevent sun yellowing and rain erosion.
- Seal every cut point and wire joint with thick waterproof silicone glue.
- Route power wires through outdoor waterproof conduit; use an outdoor rainproof power adapter and socket.
- For ground balcony edge lighting: Use tube-style IP67 strips fixed with ground clips, avoid direct long-term foot stepping.
7. Commercial Spaces (Shop window, shelf display, long corridor)
220V high-voltage strips for long-distance laying, RGBIC for window displays
- Shop windows: Stick addressable RGBIC strips along window frames, hide transformers inside window frames.
- Retail shelves: Install rigid LED light bars or high-density COB strips under each shelf with aluminum heat sinks.
- Long corridors: Lay high-voltage strips continuously up to 50m; fix with plastic clips along ceiling edges, conceal mains wiring inside wall trunking.
Part 3: General Installation Safety Rules
- Do not fold or twist LED strips tightly during installation, especially COB and high-density strips.
- Low-voltage adapters must match the total wattage of all connected strips (leave 10% extra power margin).
- Wet areas (kitchen, bathroom, outdoors) strictly prohibit non-waterproof IP20 strips.
- Avoid installing strips close to heat sources (stove, heater) to prevent overheating and adhesive melting.
- All wiring joints should be insulated; outdoor joints require double waterproof sealing.
Part 4: Post-Install Check
- Turn on power to test all lighting functions: brightness, color modes, dimming, music sync (if applicable).
- Check if strips are firmly stuck; reinforce loose sections with cable clips.
- Organize messy wires and hide exposed adapters for a neat finish.
- Re-seal any unsealed cut points in damp/wet spaces for long service life.
Comments
There are still no comments posted ...
Rate and post your comment